Parent Access Management
The page for adding, validating, and/or rejecting potential parent/contact users.
Login Credentials
- Username: [email protected]
Using the Table
- Log in as [email protected].
- Click the
Parent Managementoption in the sidebar menu.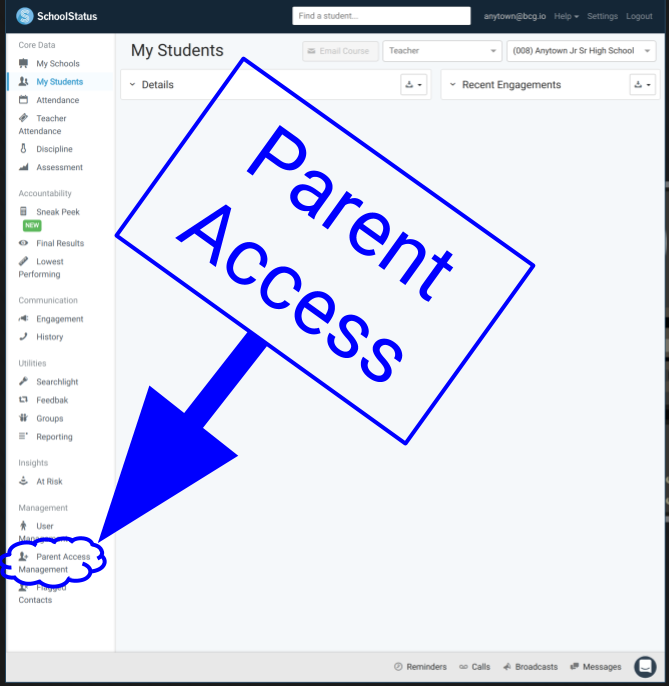
- You should now see the Parent Access Management Portal.

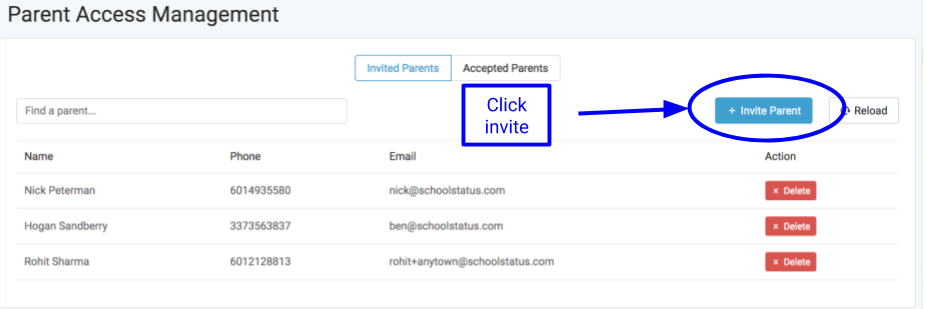
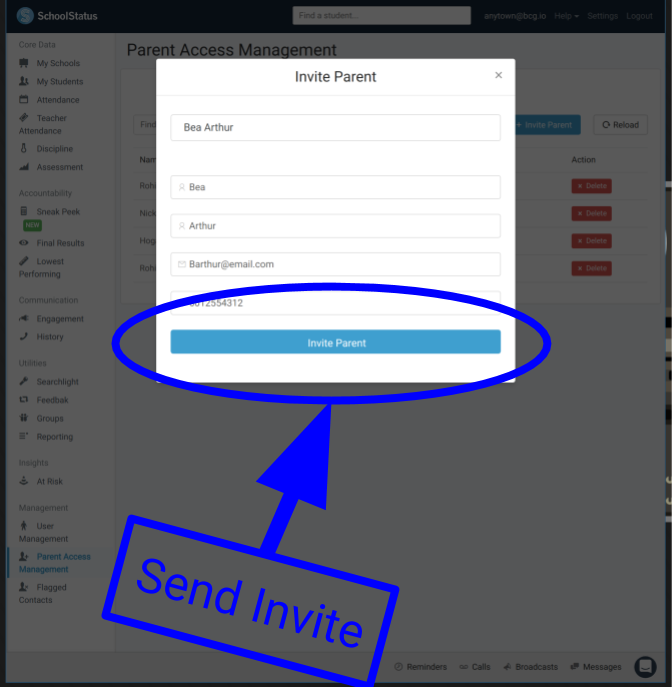
- Click Invite Parent to invite a new parent.
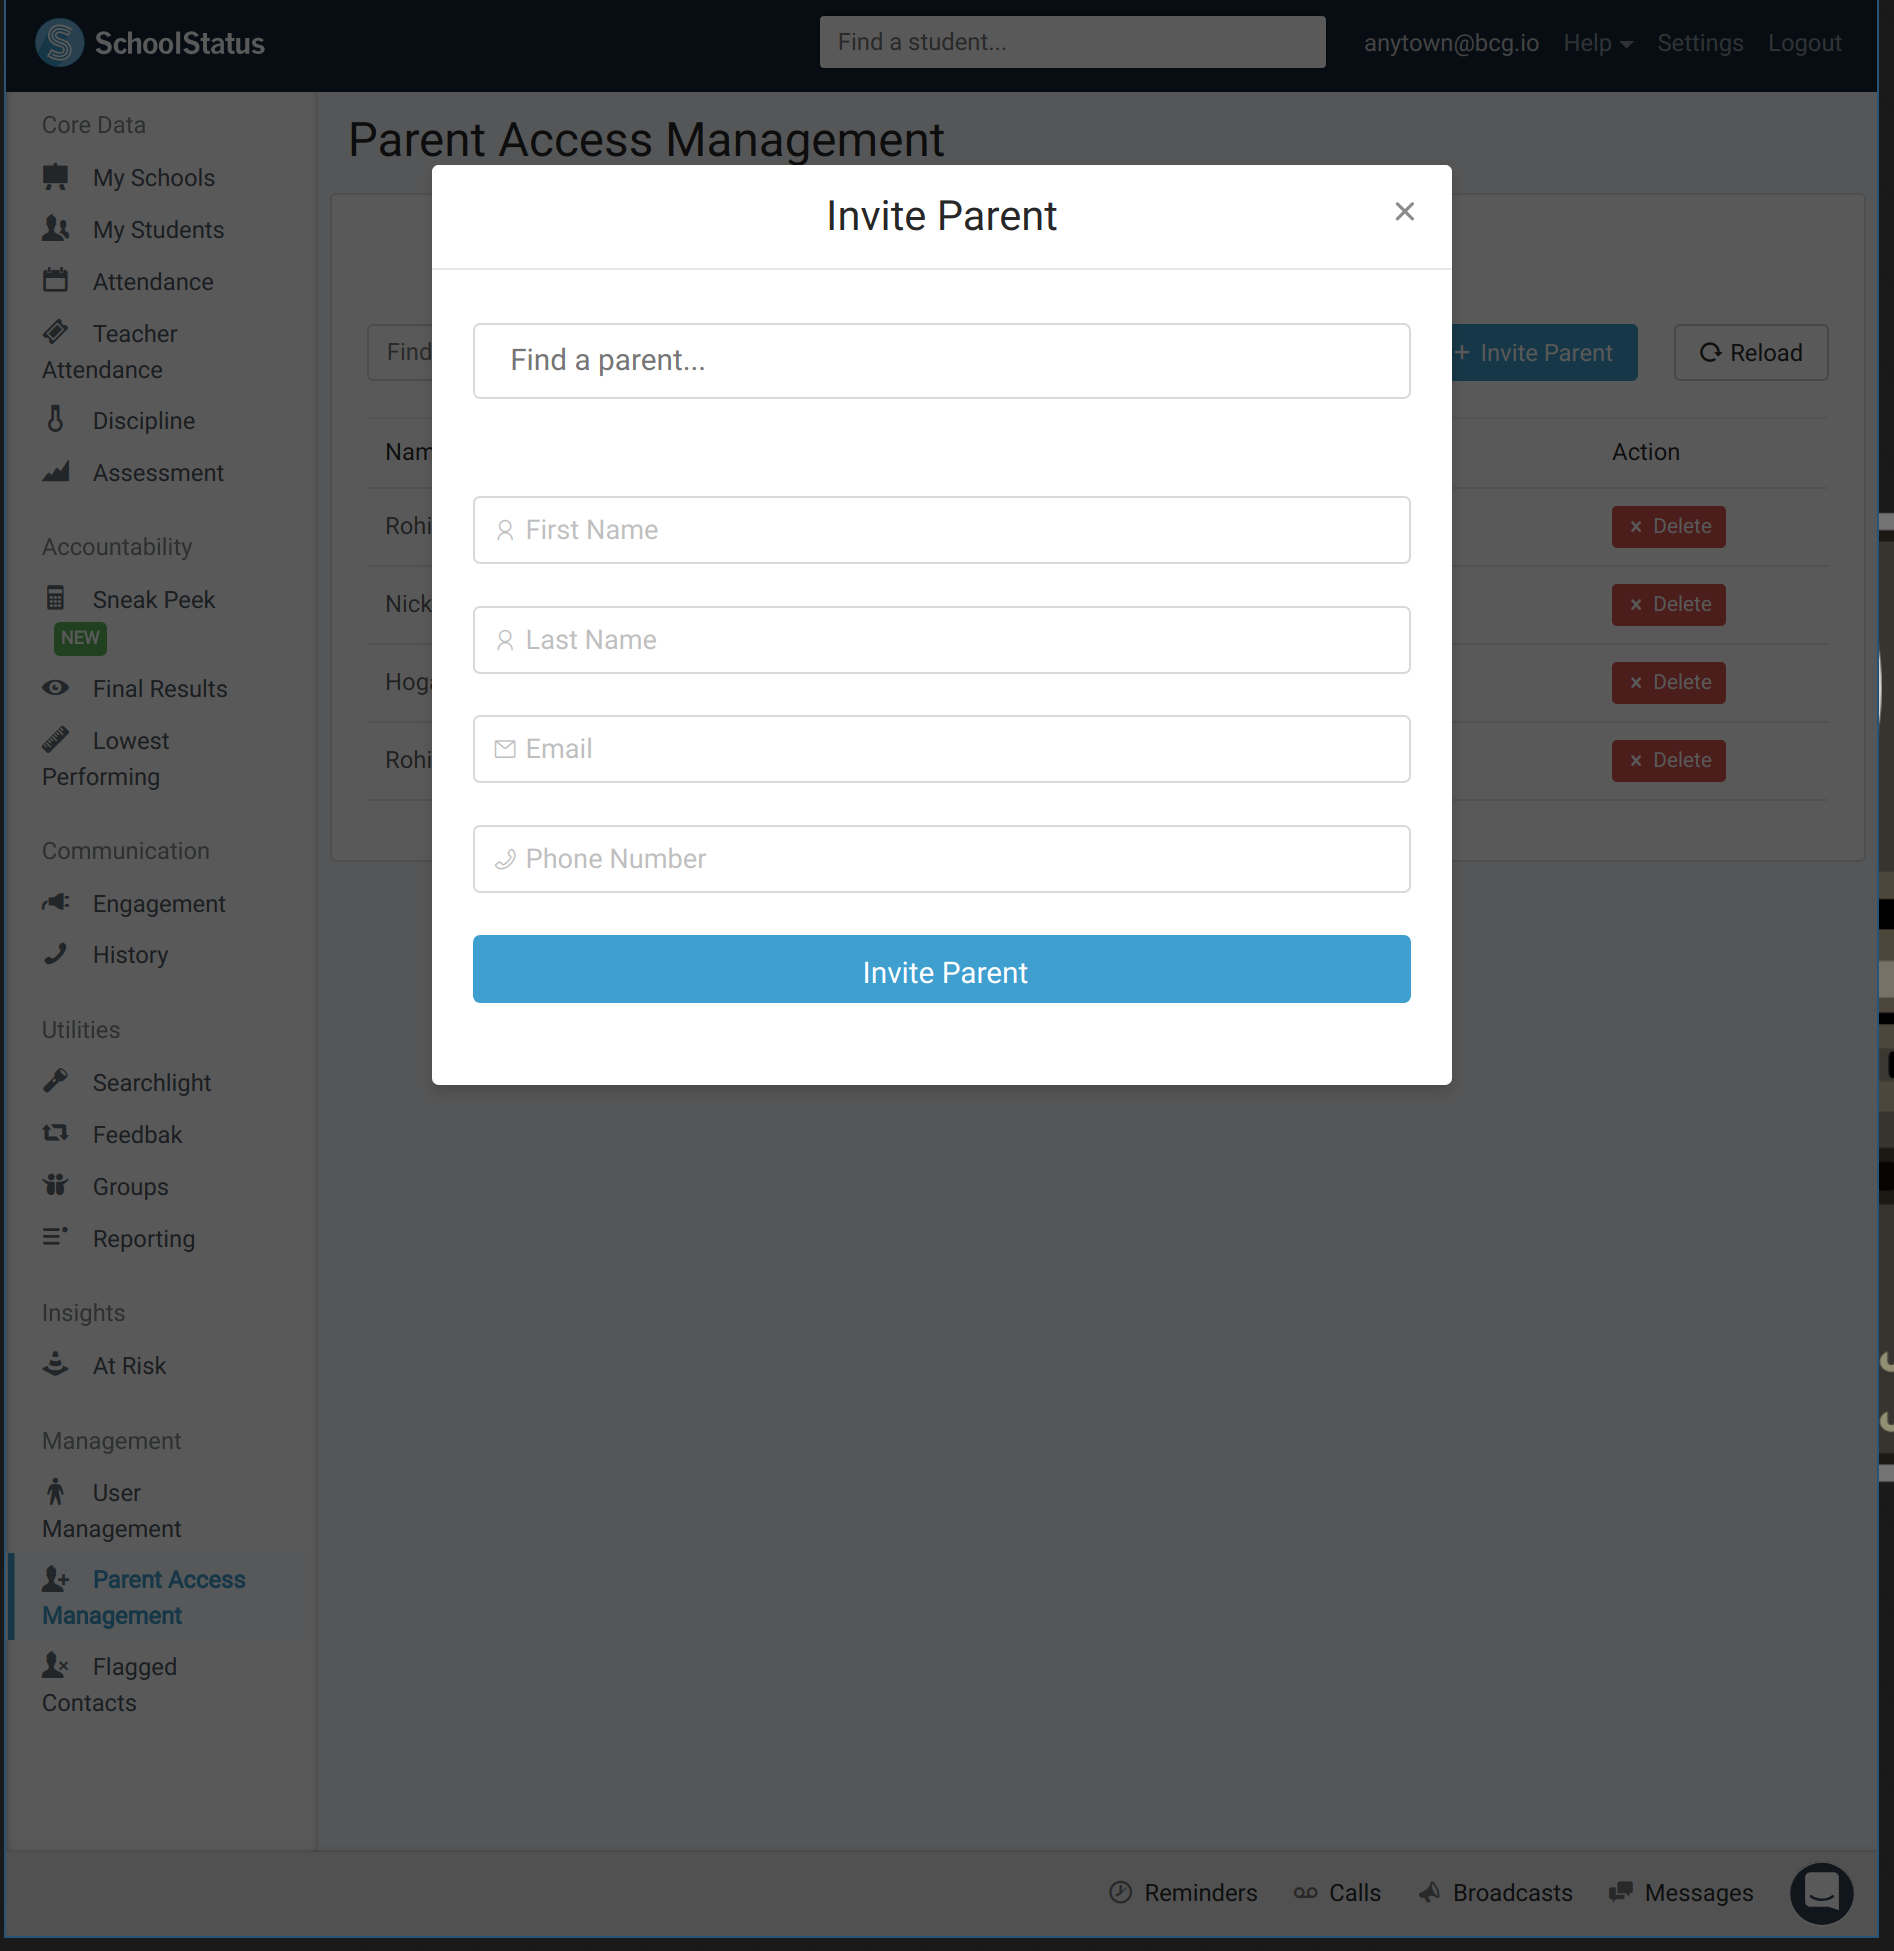
- Upon typing in a name you should see the correct parent in the drop down and upon clicking it the fields will autofill.

- Now that it has filled with the correct details. Click the send button.
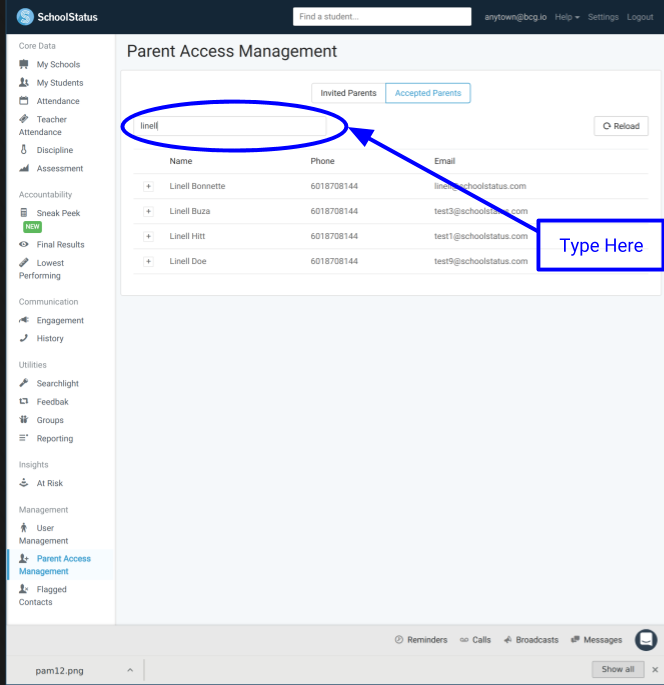
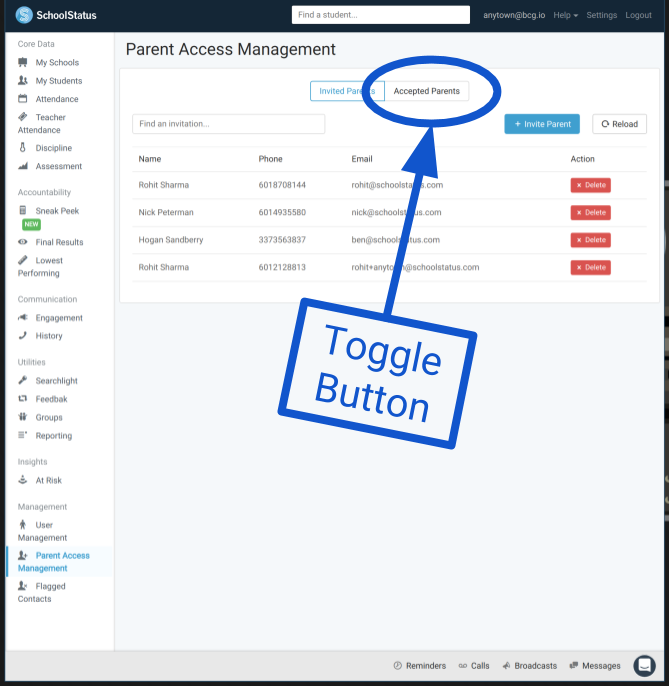
- Now click the toggle to go over to Accepted Parents.
- On any parent, you can click the + button for more info.
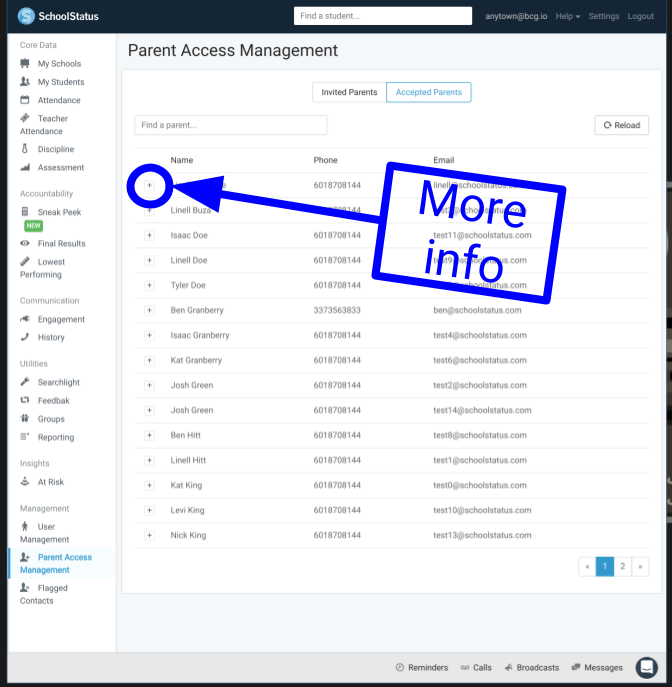
- From there you can see all of the Students the parent has been invited to.

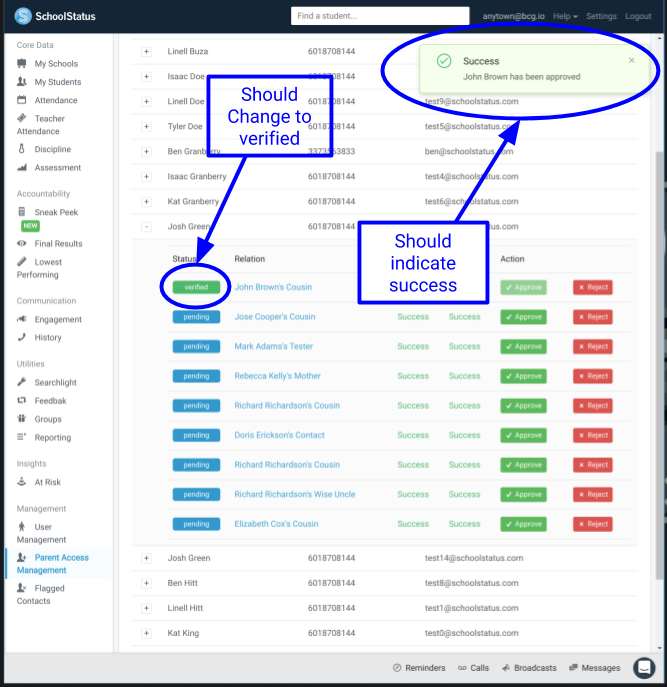
- Clicking the green
approvebutton should verify that user and allow them to log in. Clicking the redrejectbutton should reject their request. You can only approve if they parent has successfully answered the verification questions. Let's find one of those and click approve.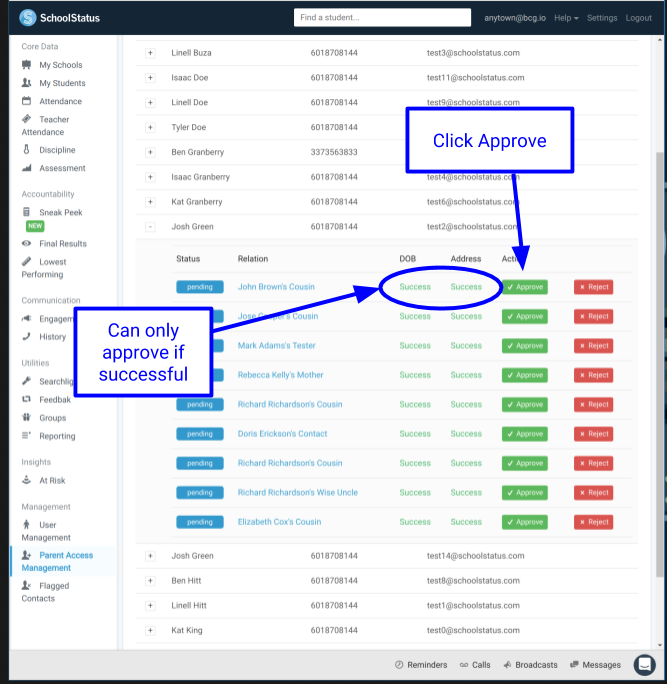
- You should see the pending change to verified and a notification indicating a successful change
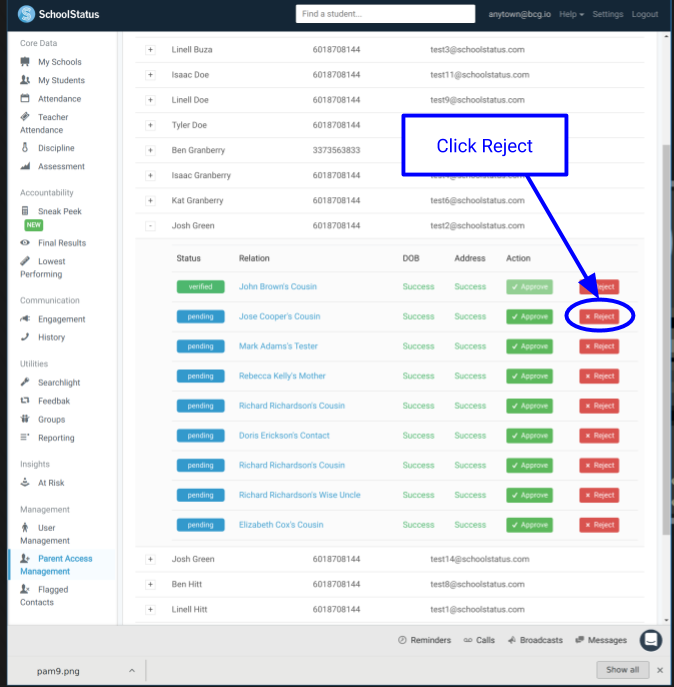
- Now click the reject button on the invitation beneath the successful one.
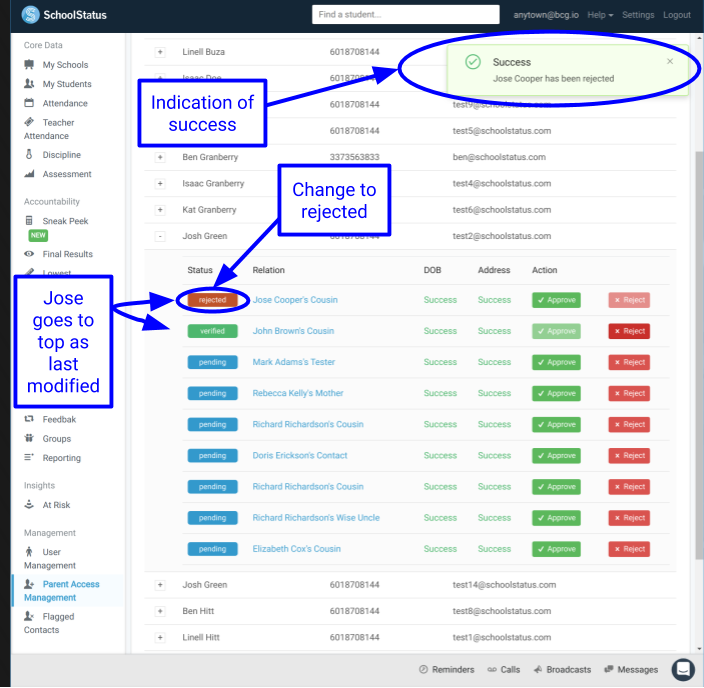
- You should see the status change, a notification that it was successfully rejected, and it will move to the top of the list as it is the most recently changed.
 14.If you have difficulty finding the Parent you want, you can search in the search bar to bring up only the ones that match your query.